Microservices K8 v 1.1


What is Microservice
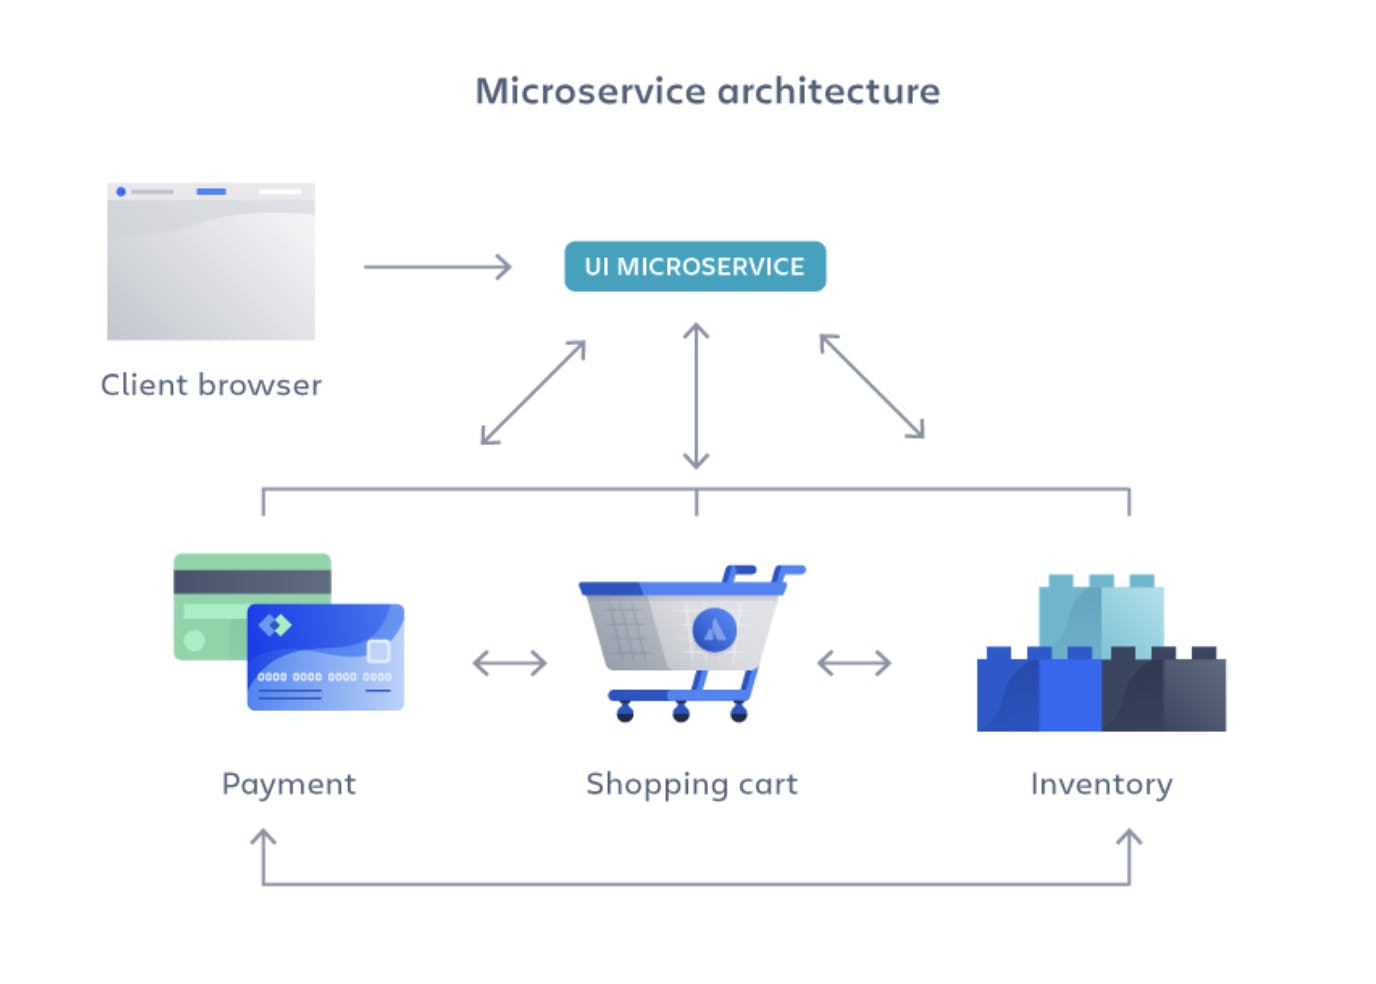
Microservice architecture is a modern approach to software development where an application is divided into smaller, independent services that can be developed, deployed, and scaled independently. Each microservice focuses on a specific business capability and communicates with other services through well-defined APIs.
Microservice architecture: Divided into smaller, independent services that can be developed and deployed independently.
Monolith architecture:
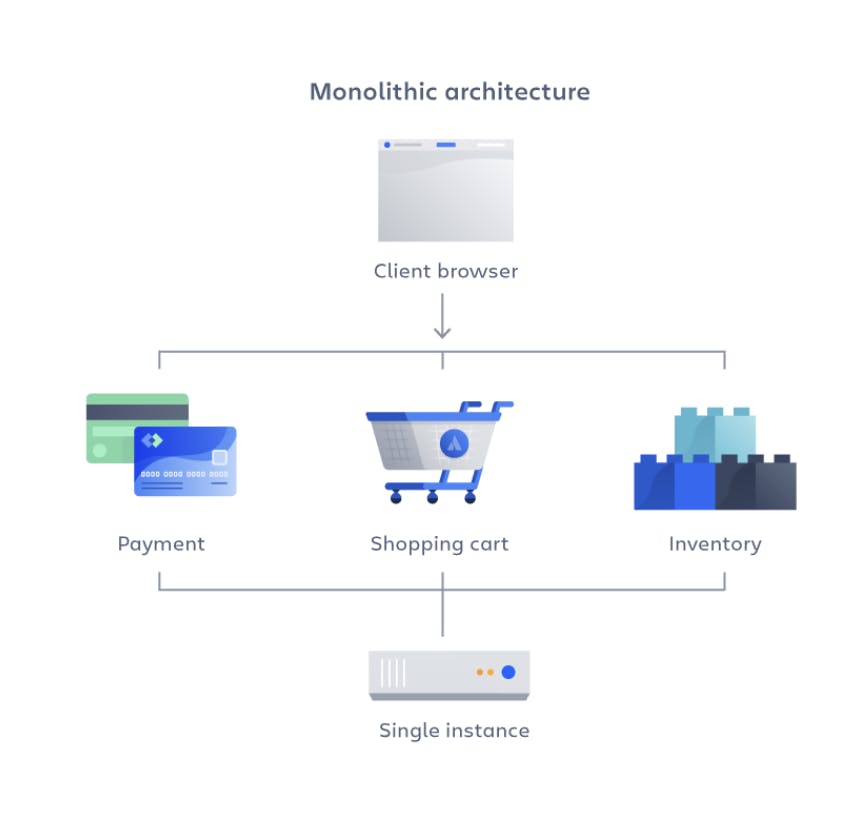
Monolith Architecture: Monolithic architecture refers to a traditional software design approach where an entire application is built as a single, unified unit. In this approach, all the components and functionalities of the application are tightly coupled together and run as a single, monolithic system.
Monolithic architecture: A single, tightly-coupled application where all components are interconnected.
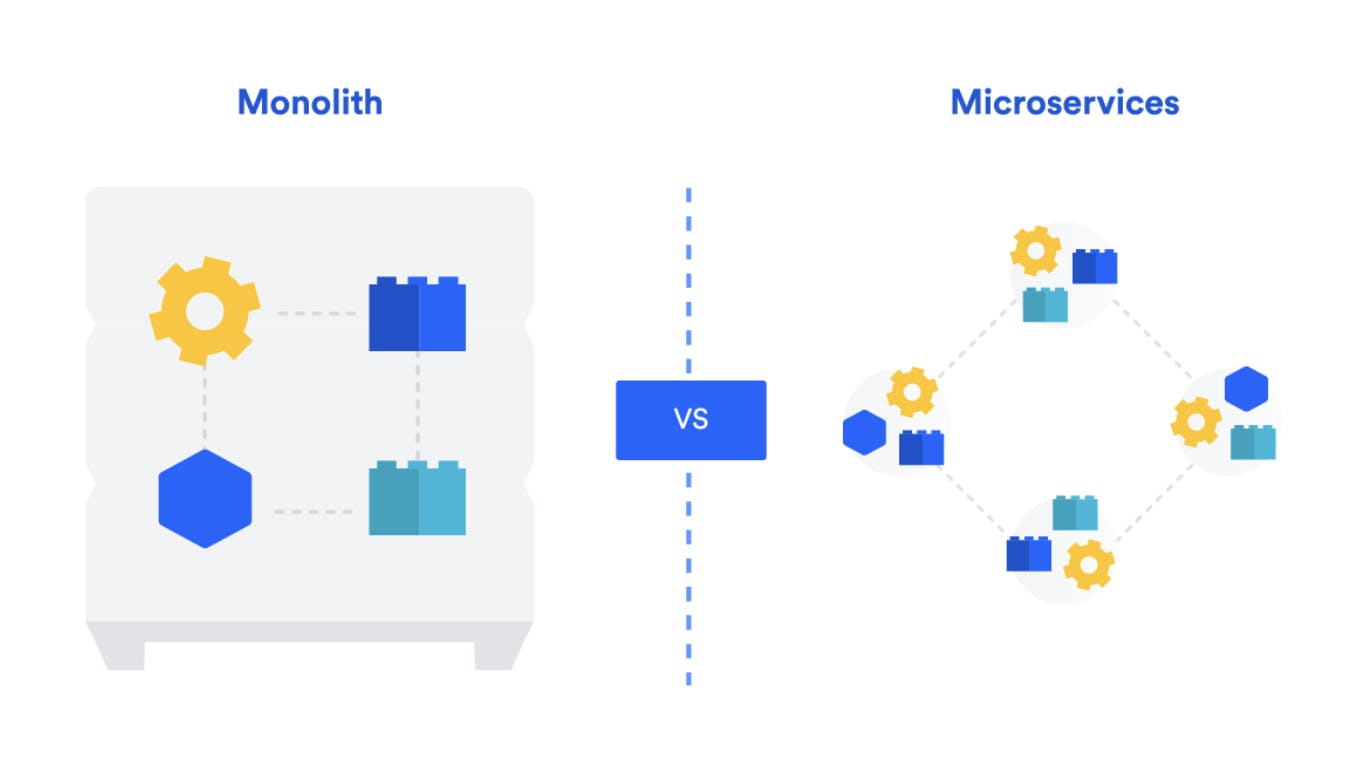
| Feature | Monolith | Microservice |
| Architecture | Monolithic architecture is where all components are tightly coupled and packaged together as a single unit. | Decentralized architecture where components are loosely coupled and developed and deployed independently. |
| Scalability | Limited scalability due to the need to scale the entire application. | Highly scalable as individual microservices can be scaled independently based on demand. |
| Development | Development is usually done by a single team working on the entire application. | Development can be distributed among multiple teams, each responsible for different microservices. |
| Complexity | Can become complex and hard to maintain as the application grows larger. | Provides a simpler and more modular structure, making it easier to develop and maintain. |
| Technology Stack | Typically built using a single technology stack and framework. | Can use different technology stacks and frameworks for each microservice based on its specific requirements. |
| Fault Isolation | A failure in one component can bring down the entire application. | Failures are isolated to individual microservices, minimizing the impact on the overall system. |
| Deployment | Requires the entire application to be deployed together. | Allows independent deployment of individual microservices, enabling faster and more frequent deployments. |
| Scalability | Requires horizontal scaling of the entire application, even if only a few components require more resources. | Enables horizontal scaling of specific microservices that need more resources, reducing unnecessary resource allocation. |
| Flexibility | Limited flexibility in choosing technologies and frameworks due to the monolithic nature. | Offers flexibility in selecting technologies and frameworks for each microservice, allowing the use of best-suited tools. |
| Communication | Internal communication between components is usually done through in-memory function calls. | Communication is typically achieved through lightweight protocols like HTTP or messaging systems. |
| Testing | Testing is often complex and time-consuming due to the tightly coupled nature of the application. | Easier to test individual microservices in isolation, allowing more focused and efficient testing. |
| Availability | A single point of failure can affect the entire application's availability. | Resilient architecture where failures in one microservice do not impact the availability of others. |
| Scalability | Difficult to scale different components independently, leading to resource allocation challenges. | Allows fine-grained scalability, enabling optimal resource allocation based on individual service needs. |
| Deployment | Requires downtime for deploying updates or new features to the entire application. | Can achieve continuous deployment and updates with minimal downtime by deploying individual microservices independently. |
Creating a Docker File:
#very beginning clone the repository from GitHub using the git clone command.
$git clone <HTTPS>
Github repository HTTPS: https://github.com/narkhedeakshay26/microservices-k8s.git
Using Vim editor create a docker file:
$vim Dockerfile
File:
$ cat Dockerfile

FROM python:alpine3.7
#Apline 3.7 is compressed and optimised python image
COPY . /app
#Copy source Destination
#Destination : app folder
WORKDIR /app
#app direcrtory will be working directory
RUN pip install -r requirements.txt
#requirement.txt is already placed in the repository, and installations will be done as per file
ENV PORT 5000
EXPOSE 5000
#Set up port 5000 ; Localhost
#All the above commands are intermediate commands
#After building container commands are as follows:
ENTRYPOINT [ "python" ]
#this command will be run after creating a container
CMD [ "app.py" ]
Run the Dockerfile to create a Docker image
$ docker build . -t flask-api:latest
# ":latest is nothing but the version.
# $ docker build . -t flask-api:v1 we can even do this, for version 1
#to remember easy use always latest
#Note: Make sure you already have docker installed in your system.
$docker ps

If not, follow the command:
$ sudo apt-get install docker.io
you may see an error: Got permission denied while trying to connect to the Docker daemon socket at unix:///var/run/docker.
This error is because docker is not added to the user group.
How to know that, run the command:
$echo $USER

To add Docker as a user, run the following command:
$ sudo usermod -aG docker $USER
Then make sure you reboot the system, to apply those changes
$sudo reboot
Log into the terminal again:
$docker ps

Now Docker is successfully running on our system.
To view the images created :
$docker images

To run the docker image:
$ docker run -d -p 5000:5000 flask-api:latest
# -d : To run the image in detached mode (background)
# -p : To assign the ports
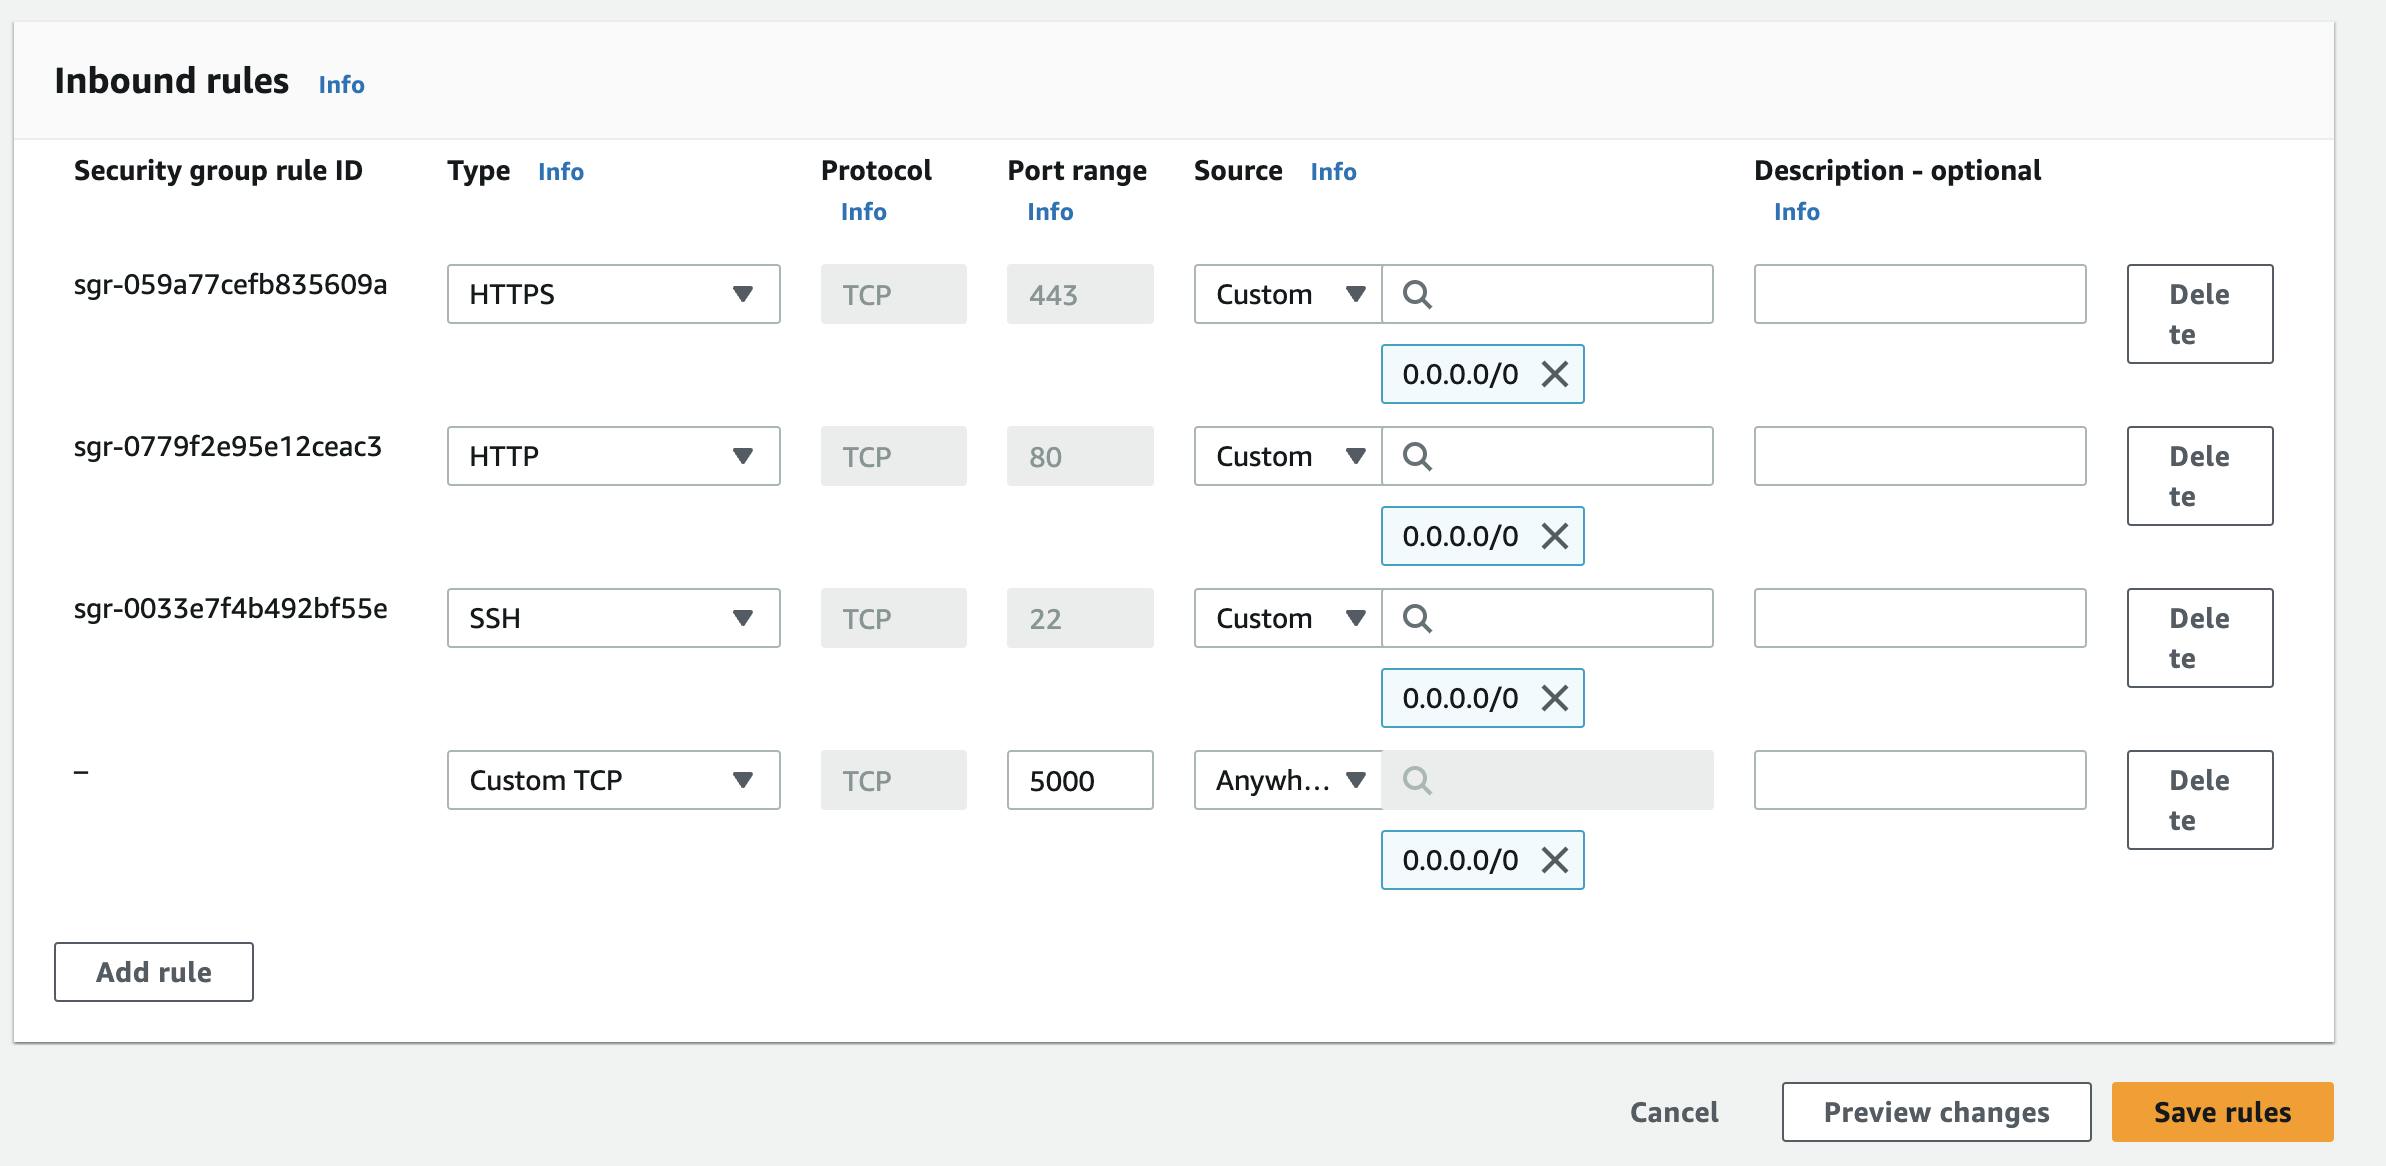
Add inbound rule:
For steps see my previous blog: https://akshaynarkhede.hashnode.dev/creating-a-to-do-application-docker-file

The application is running successfully.
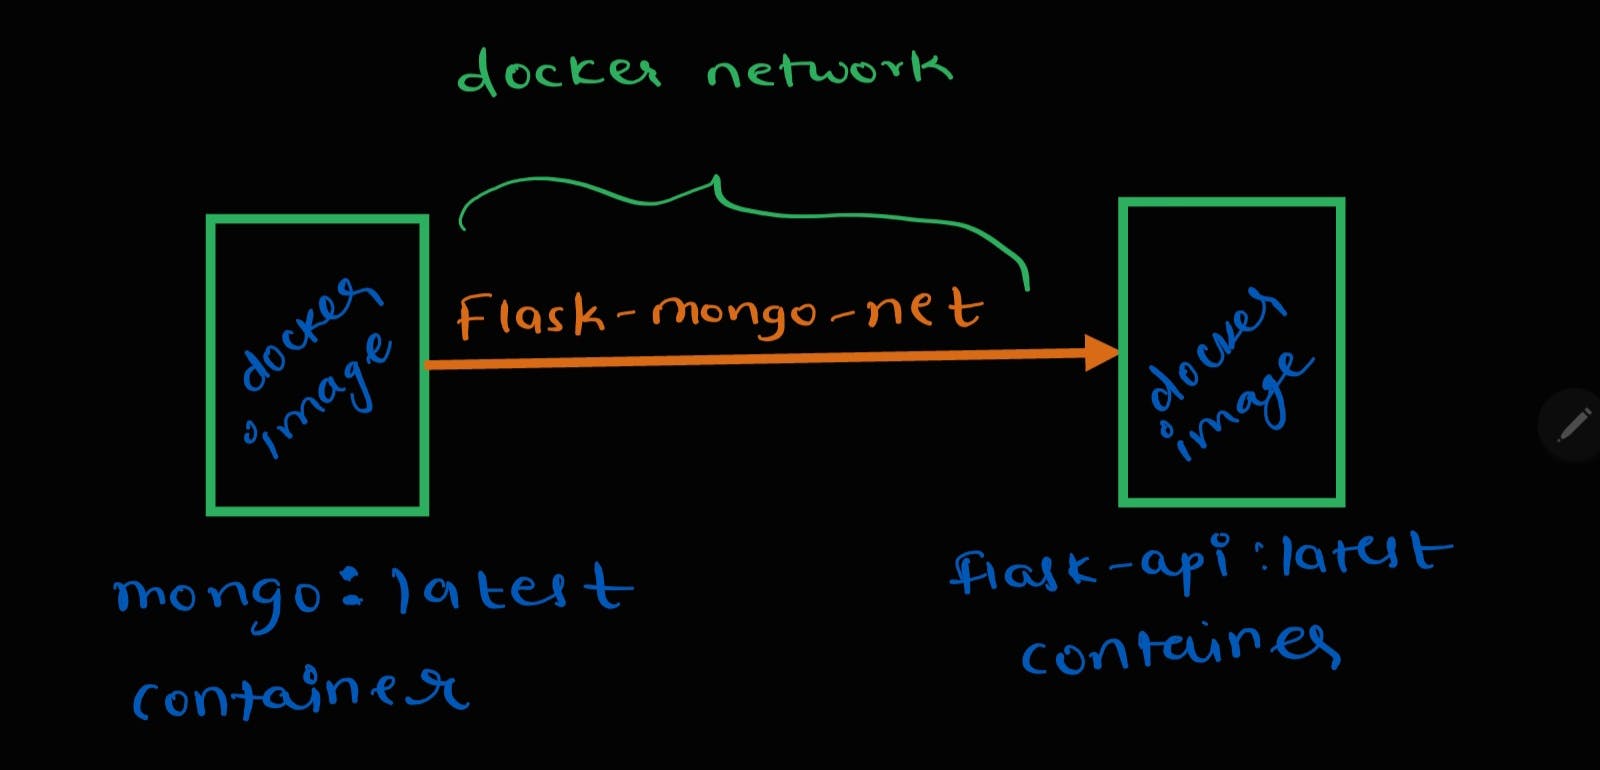
Creating a Docker Network:
Using the Postman tool, we will check the API of the welcome page:
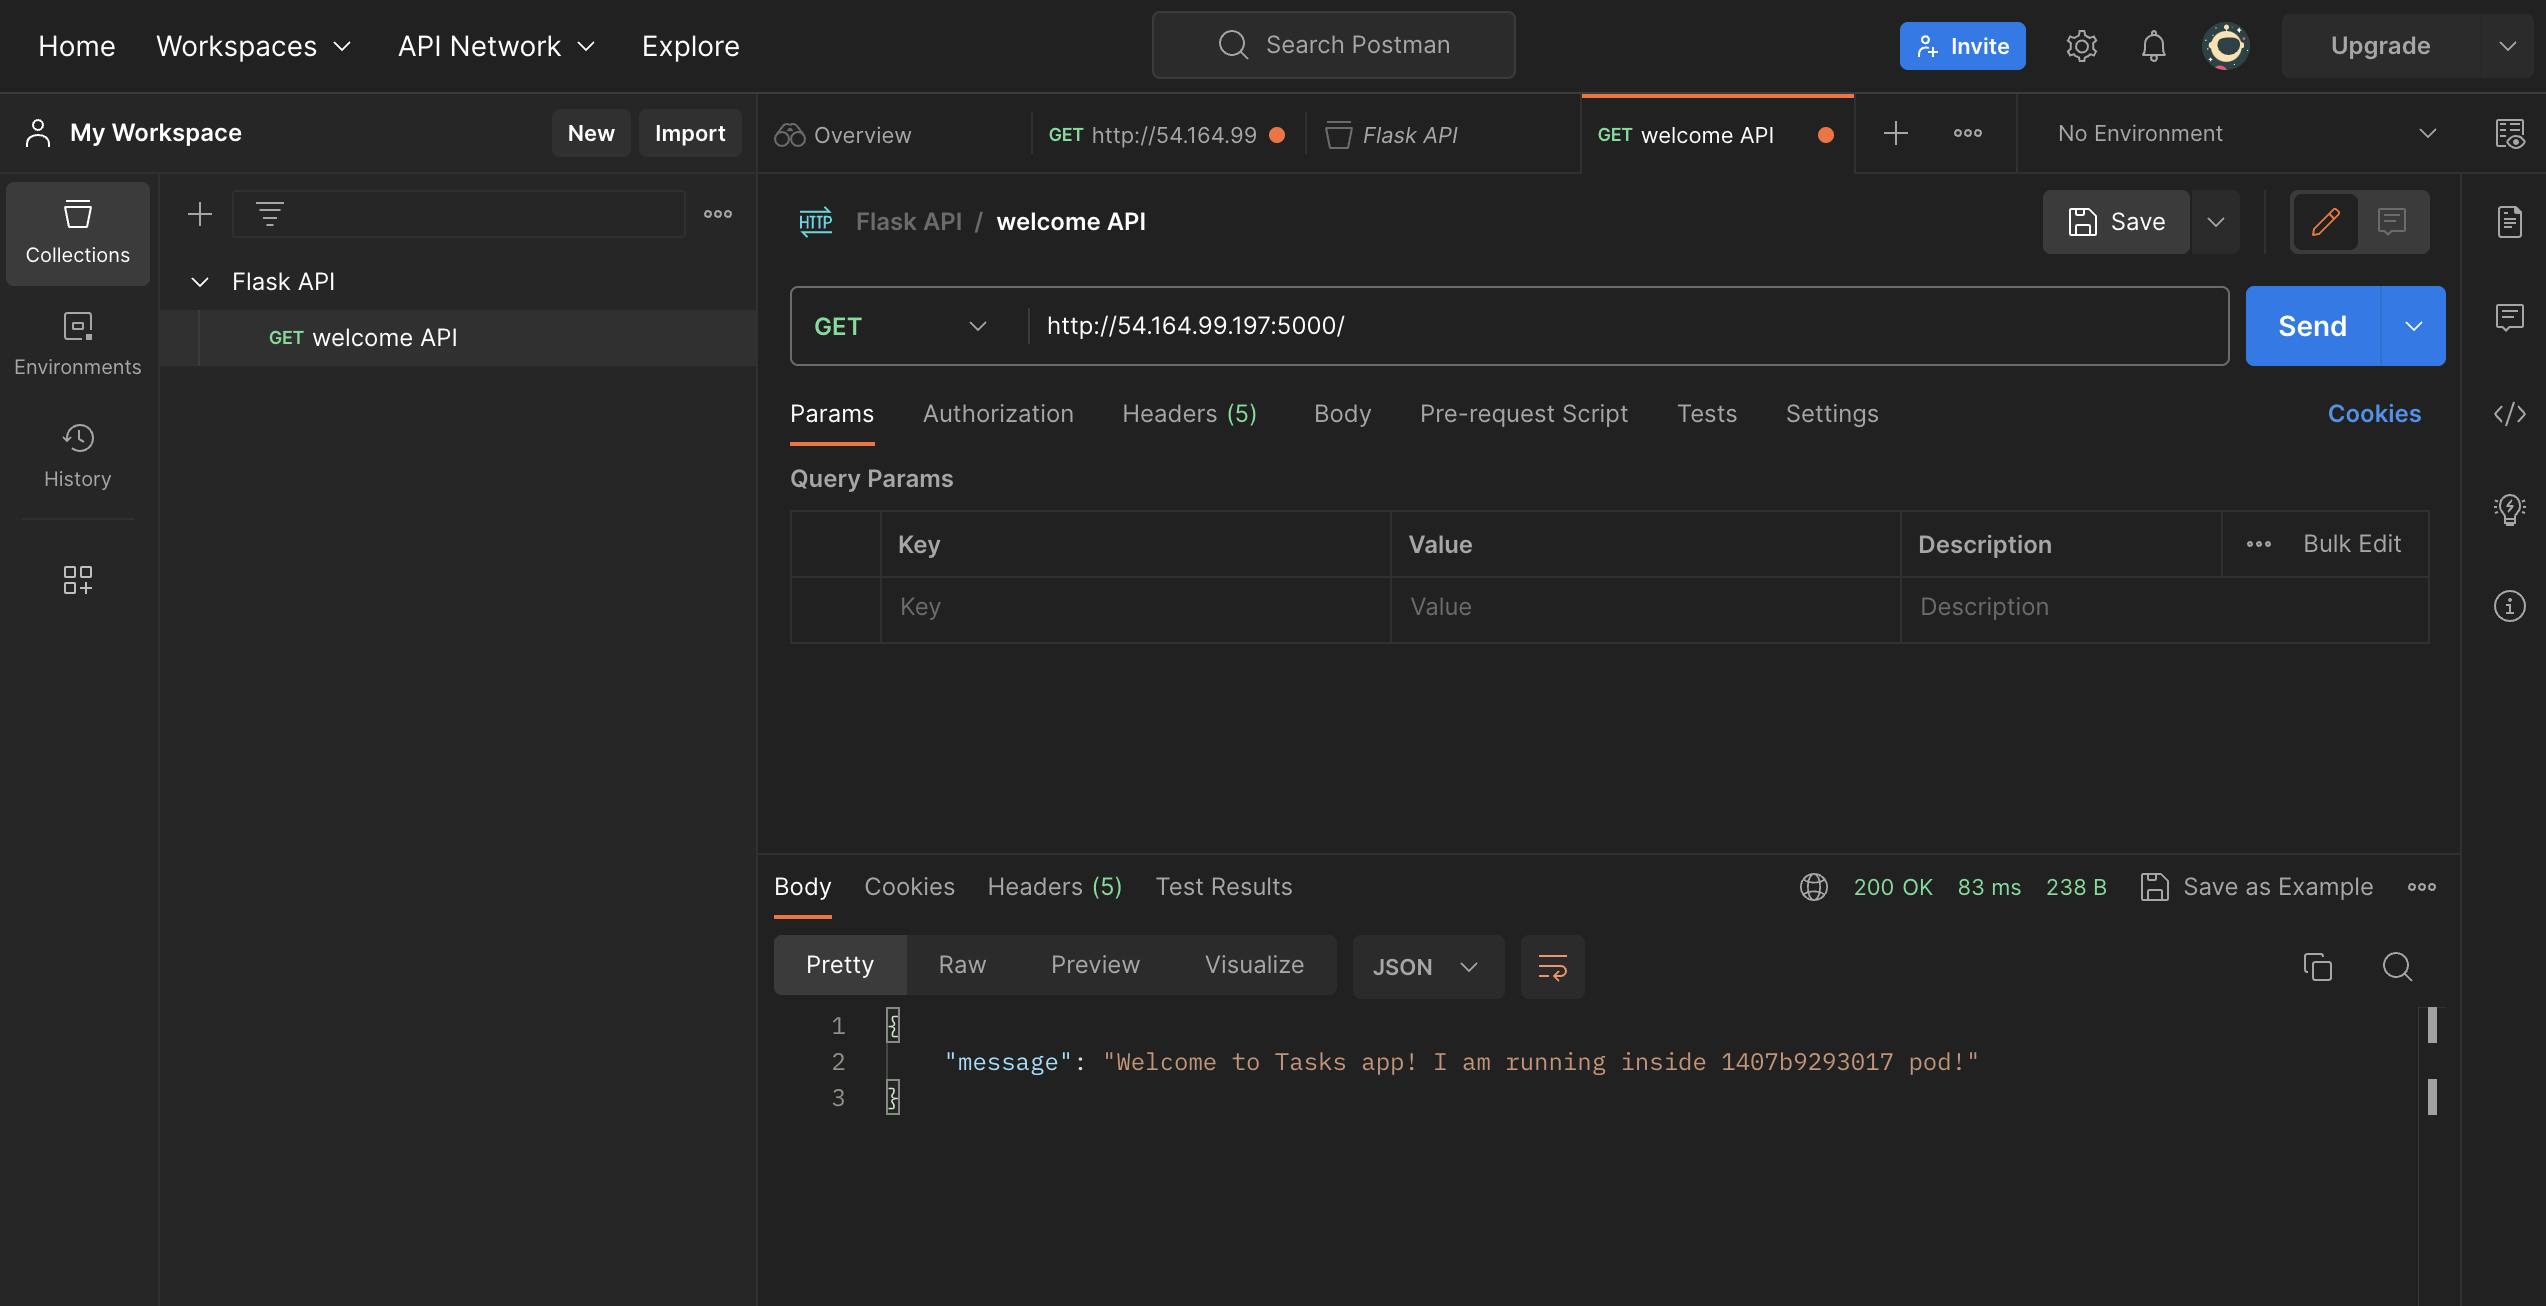
The welcome page API is successfully working.
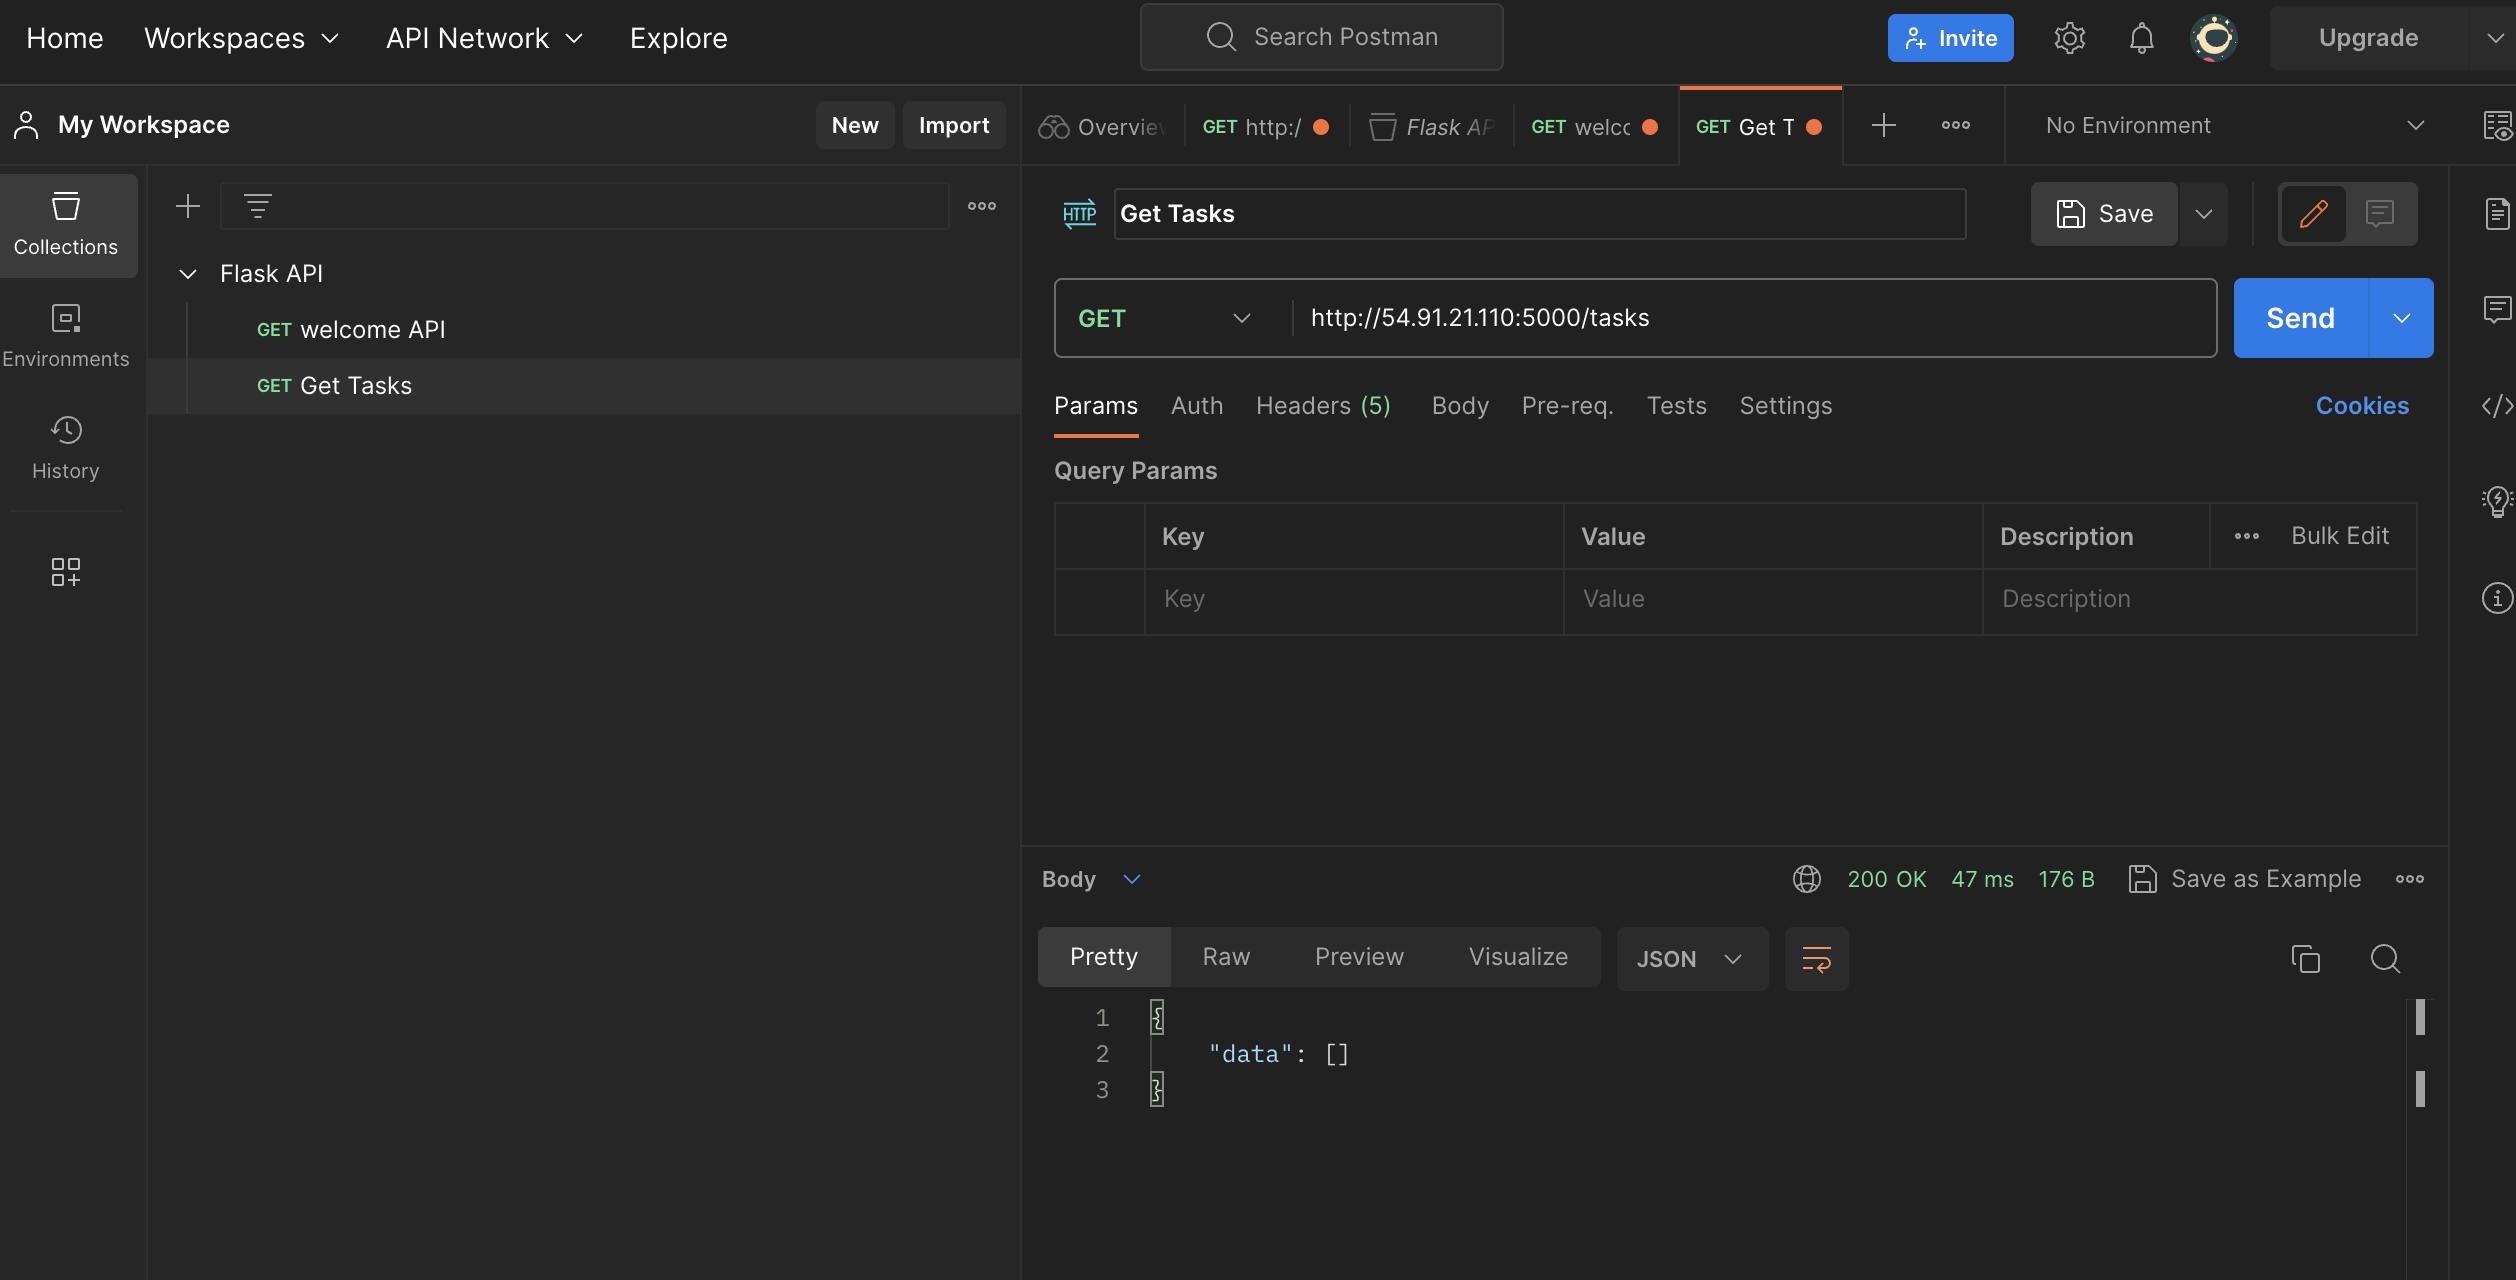
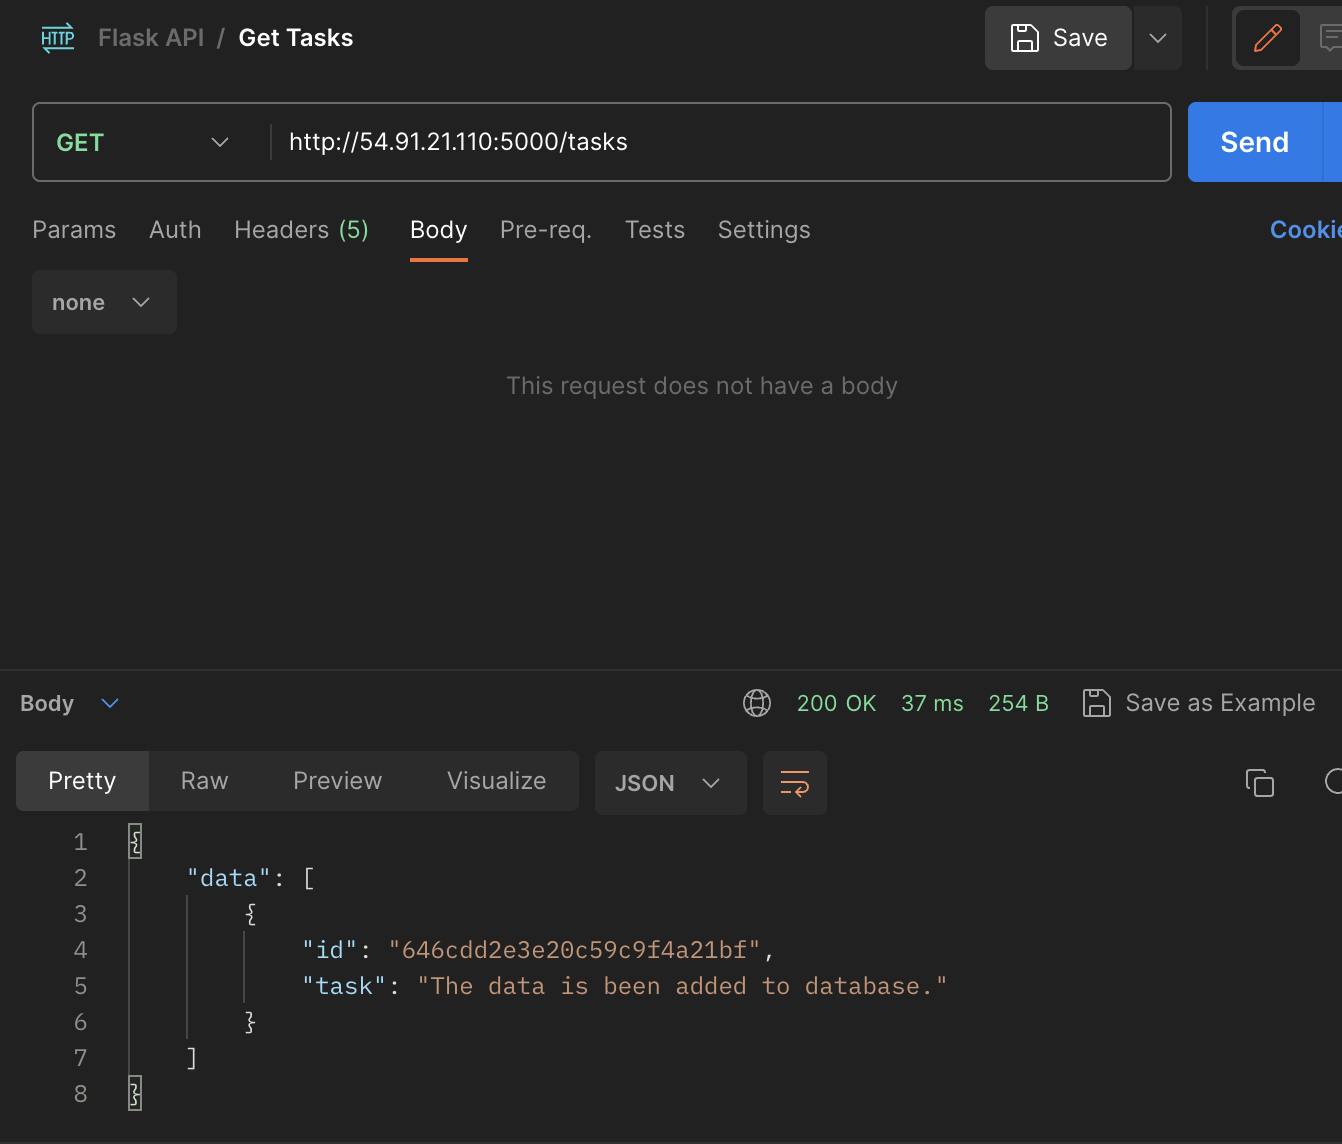
Now we will try to access the tasks page:
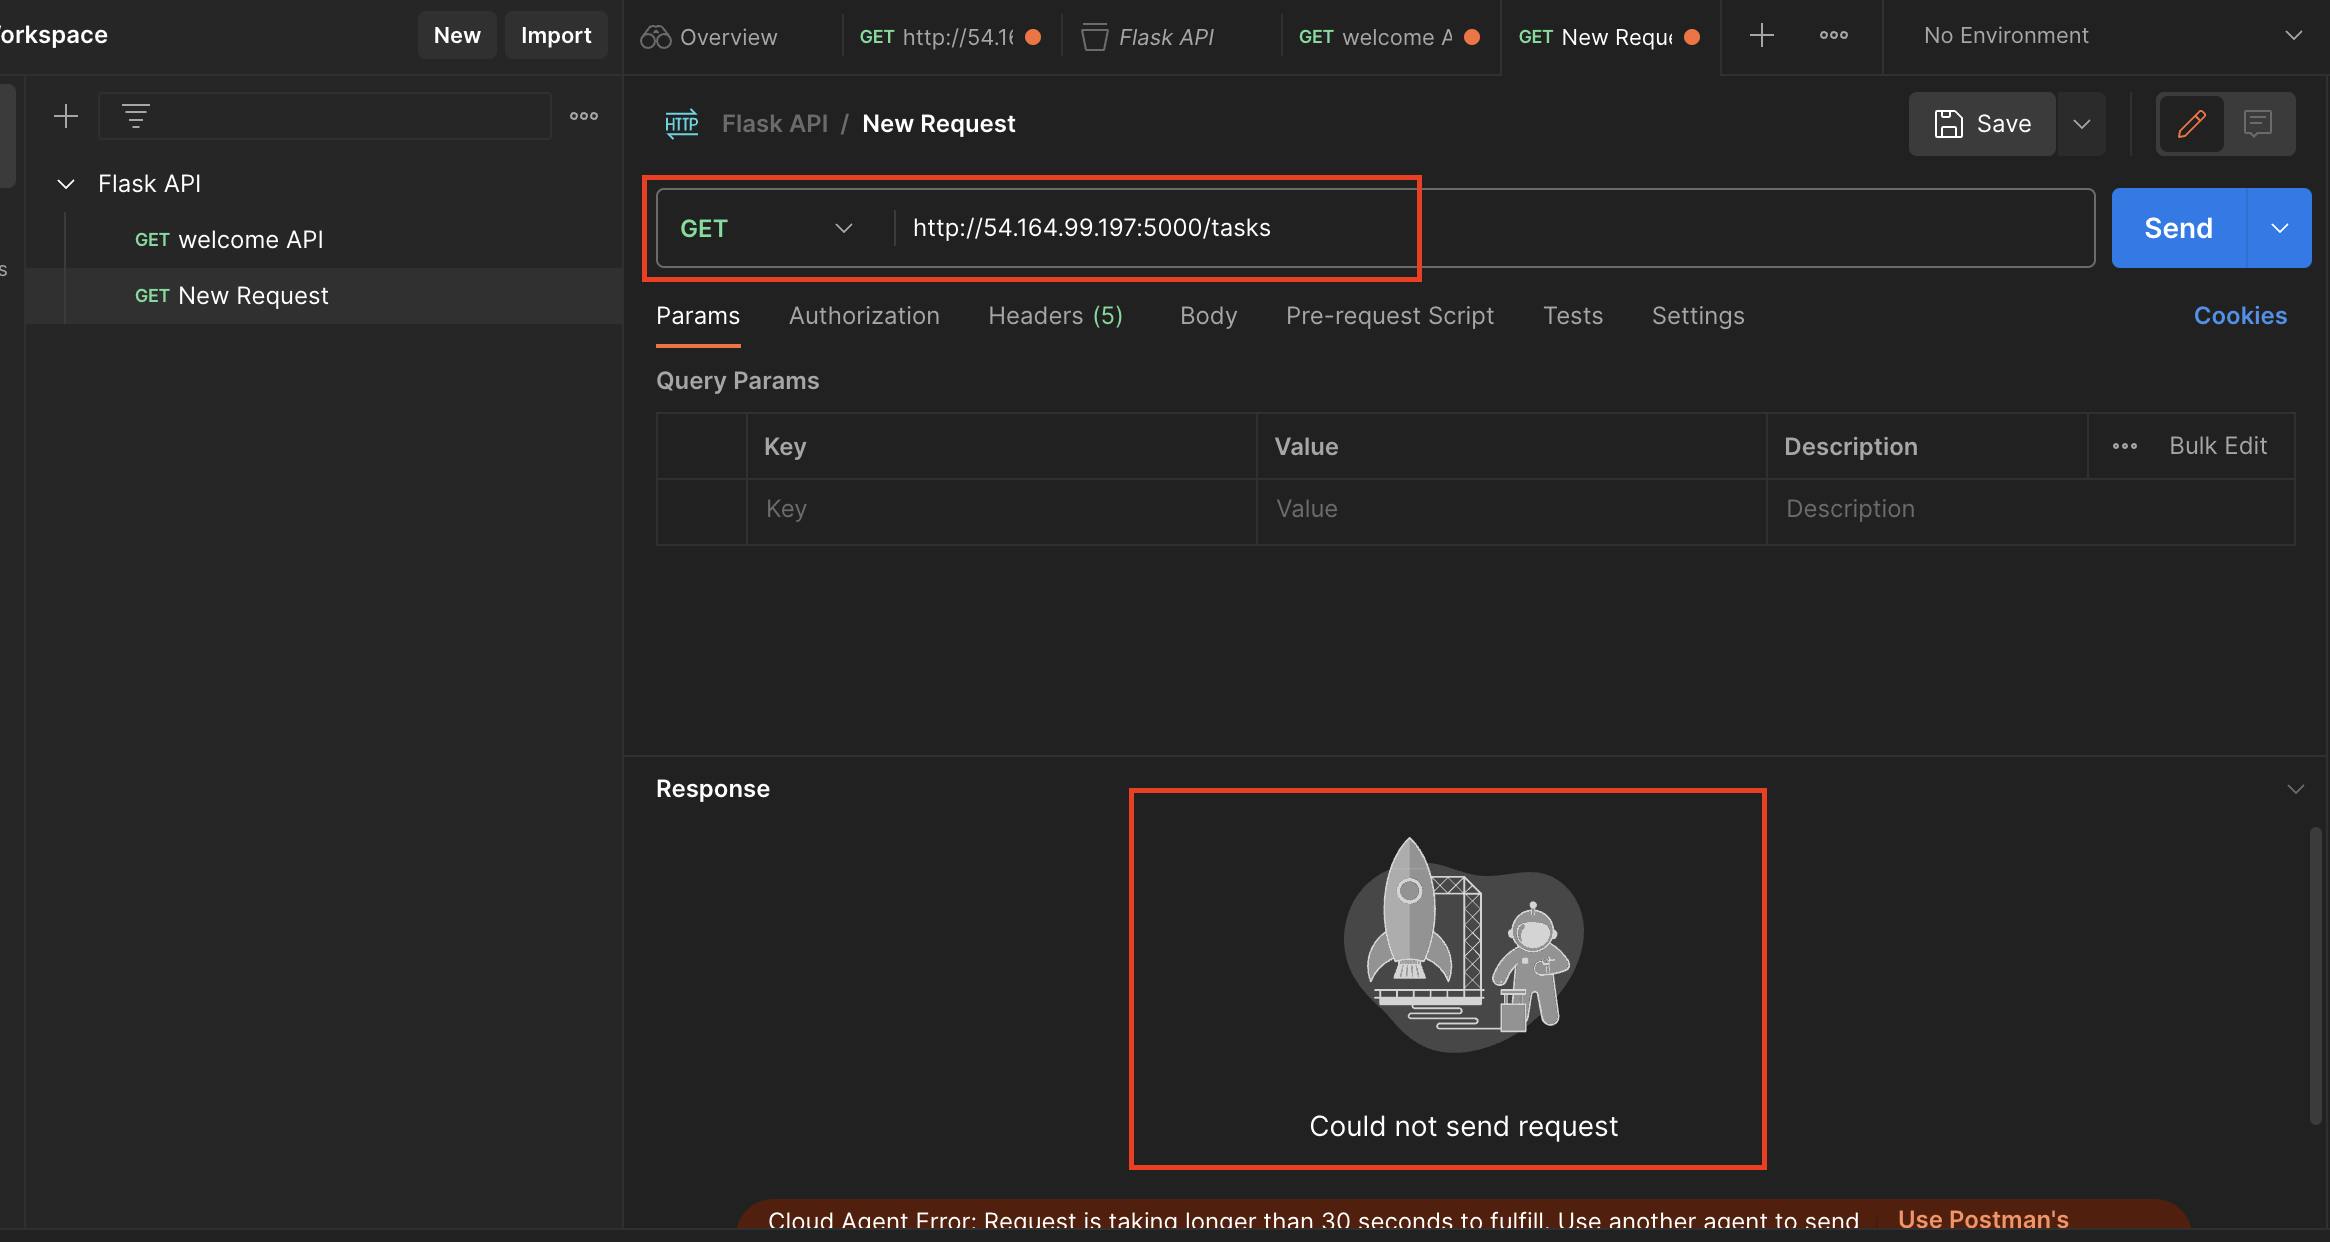
This is because, we have to create a database first, using "Mongodb"
To run the MongoDB container:
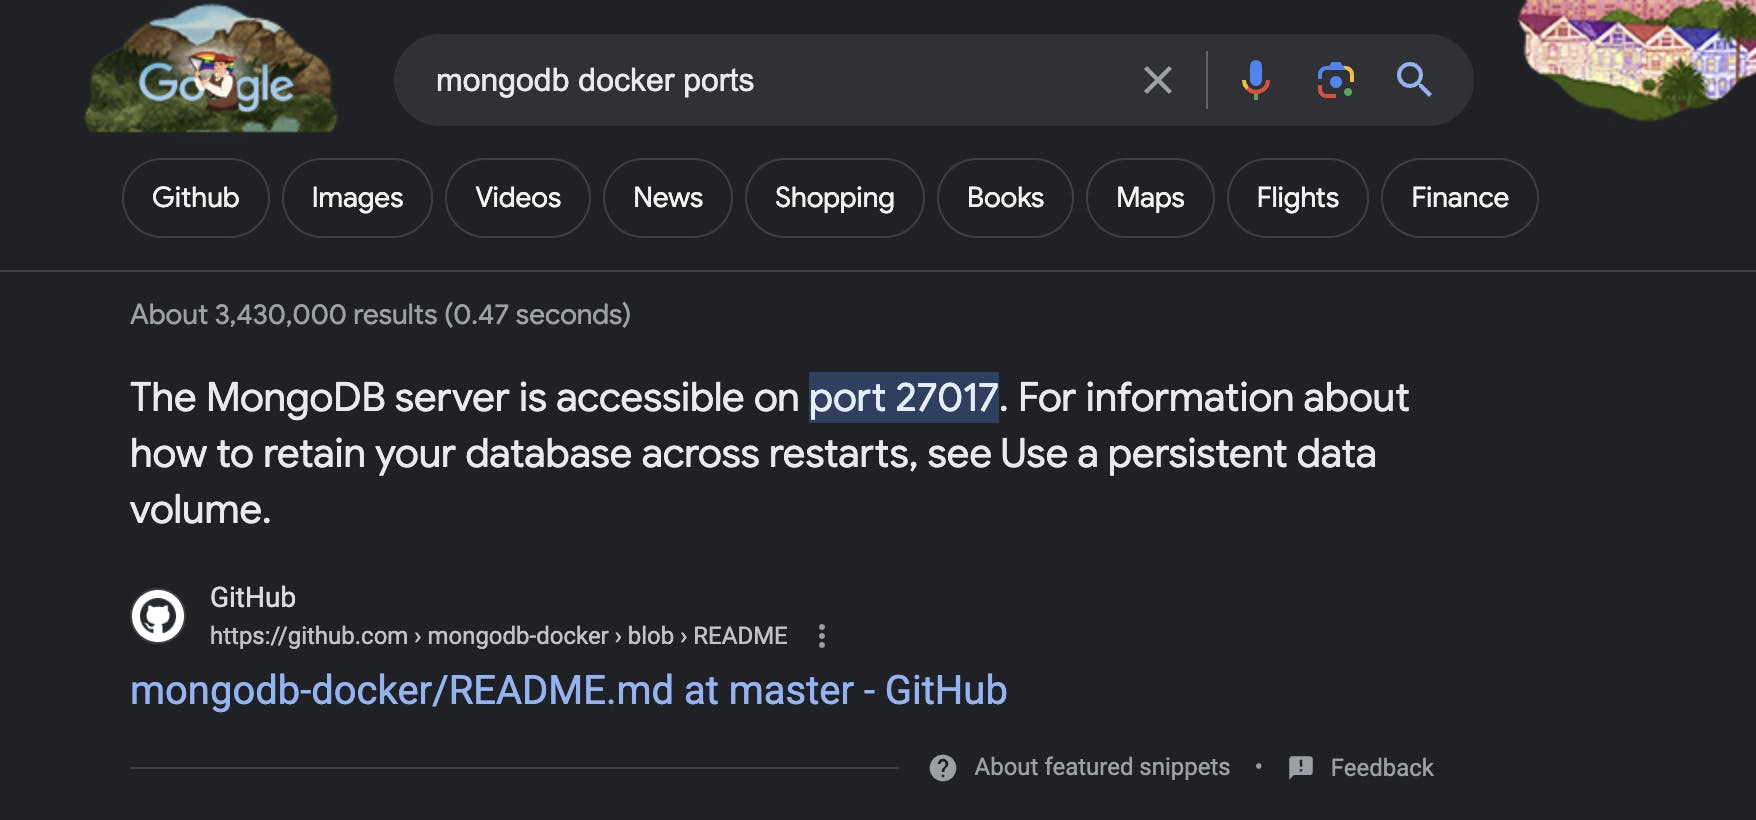
$ docker run -d -p 27017:27017 --name mongo mongo:latest
# -d : to run the app in detached mode
# -p : to assign ports
# --name : is the syntax to name the container: mongo
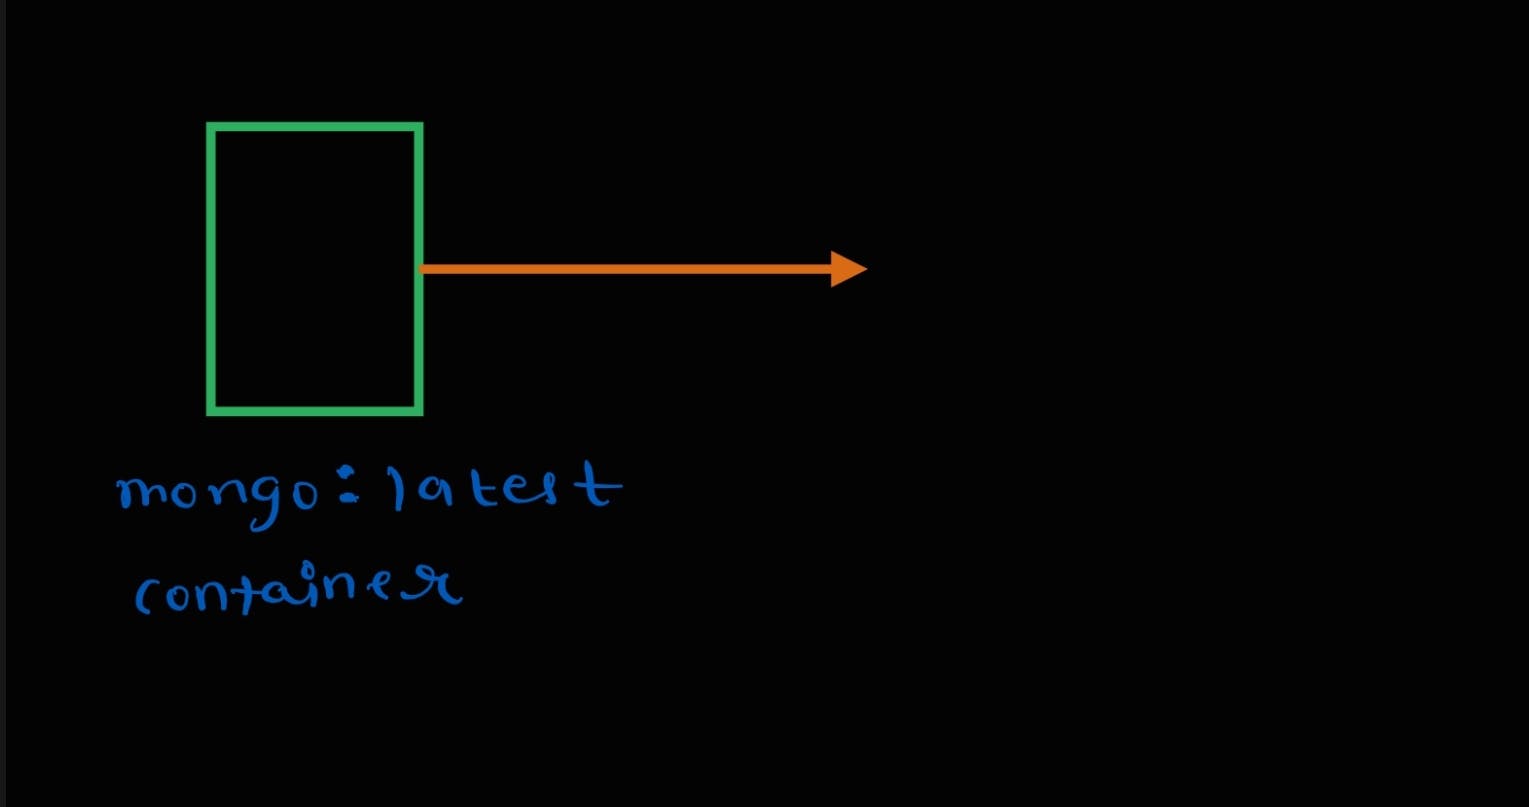
Remember this is a microservice level project. The containers are running in isolation.
Docker Network:
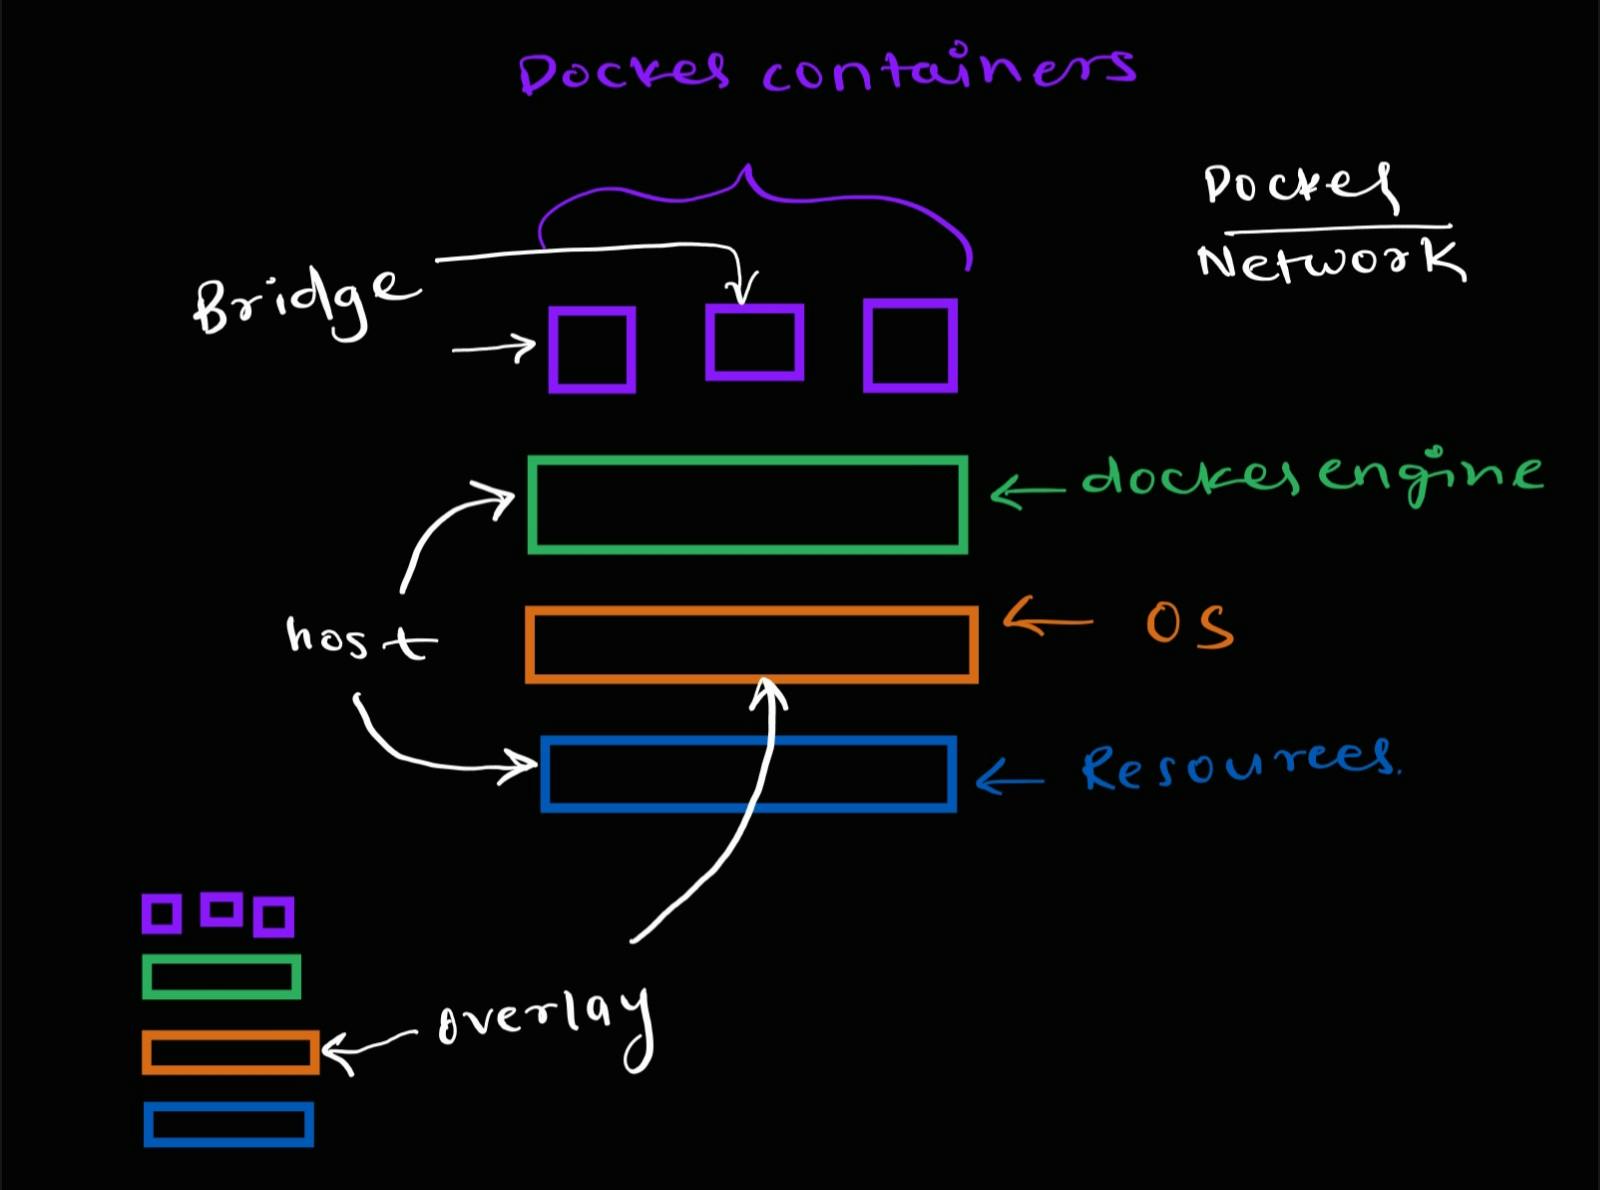
To connect the containers, we will need to use the Docker Network concept:
bridge: The default network driver. If you don’t specify a driver, this is the type of network you are creating. Bridge networks are usually used when your applications run in standalone containers that need to communicate.host: For standalone containers, remove network isolation between the container and the Docker host, and use the host’s networking directly.overlay: Overlay networks connect multiple Docker daemons together and enable swarm services to communicate with each other. You can also use overlay networks to facilitate communication between a swarm service and a standalone container, or between two standalone containers on different Docker daemons. This strategy removes the need to do OS-level routing between these containers.ipvlan: IPvlan networks give users total control over both IPv4 and IPv6 addressing. The VLAN driver builds on top of that in giving operators complete control of layer 2 VLAN tagging and even IPvlan L3 routing for users interested in underlay network integration.macvlan: Macvlan networks allow you to assign a MAC address to a container, making it appear as a physical device on your network. The Docker daemon routes traffic to containers by their MAC addresses. Using themacvlandriver is sometimes the best choice when dealing with legacy applications that expect to be directly connected to the physical network, rather than routed through the Docker host’s network stack.none: For this container, disable all networking. Usually used in conjunction with a custom network driver.noneis available for swarm services.
The command we will use to connect the containers:
$ docker network create flask-mongo-net
#when you don't specify which network you want connect, by default it will connect using bridge network.
To view the Docker network:
$ docker network ls

To connect those containers, I need to stop them initially using docker kill command:
$ docker kill 047accadbbb0

$ docker kill 1407b9293017

Creating Flask API:
$ docker run -d -p 5000:5000 --network flask-mongo-net flask-api:latest
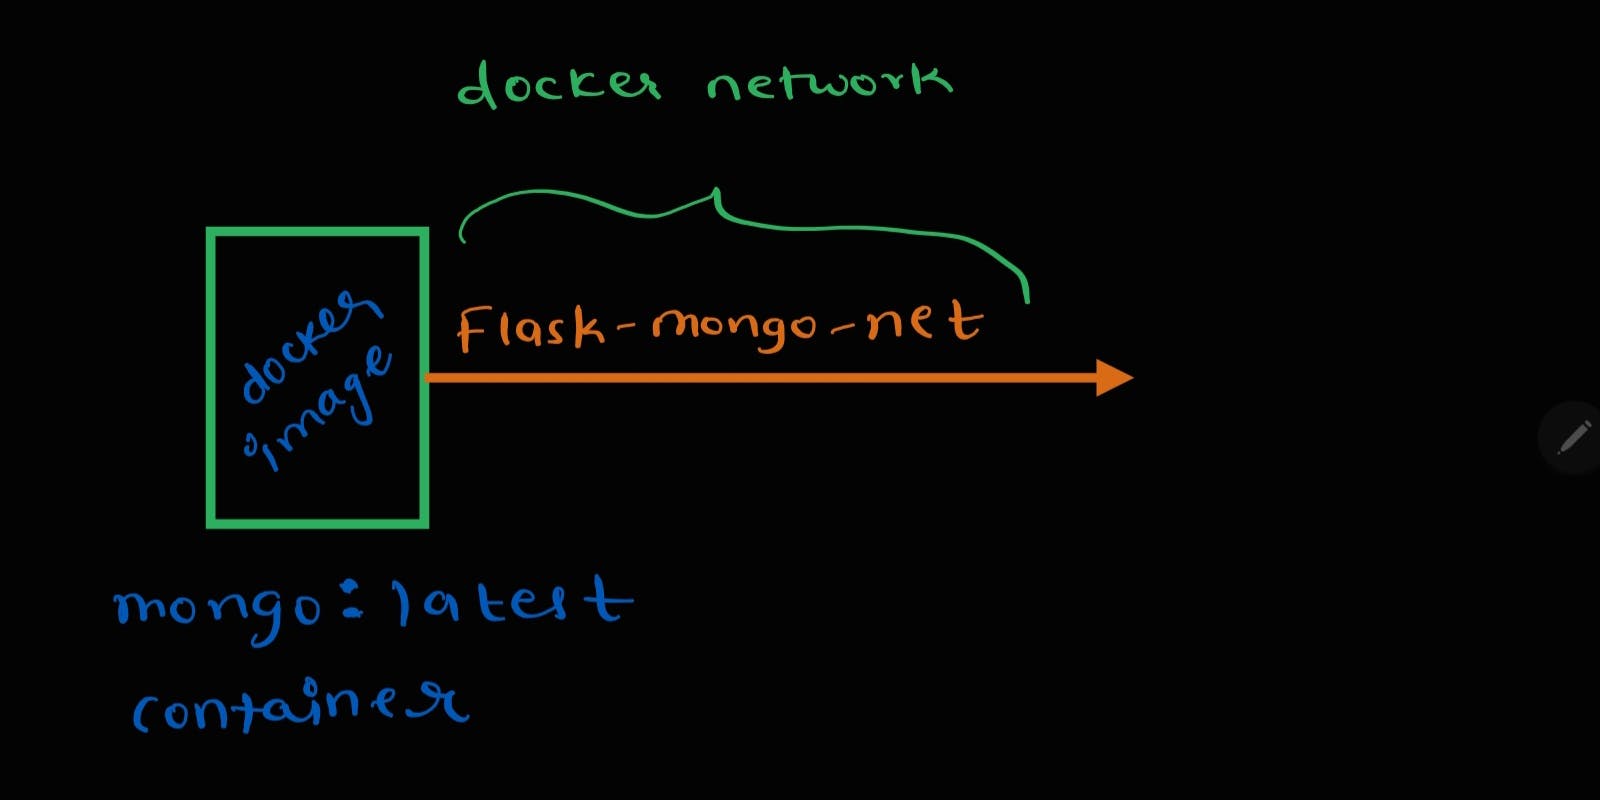
now we will connect "flask-api:latest" to the "mongo:latest" using bridge network "flask-mongo-net".
$ docker run -d -p 5000:5000 --network flask-mongo-net flask-api:latest
what we did is :
Now, open Postman:
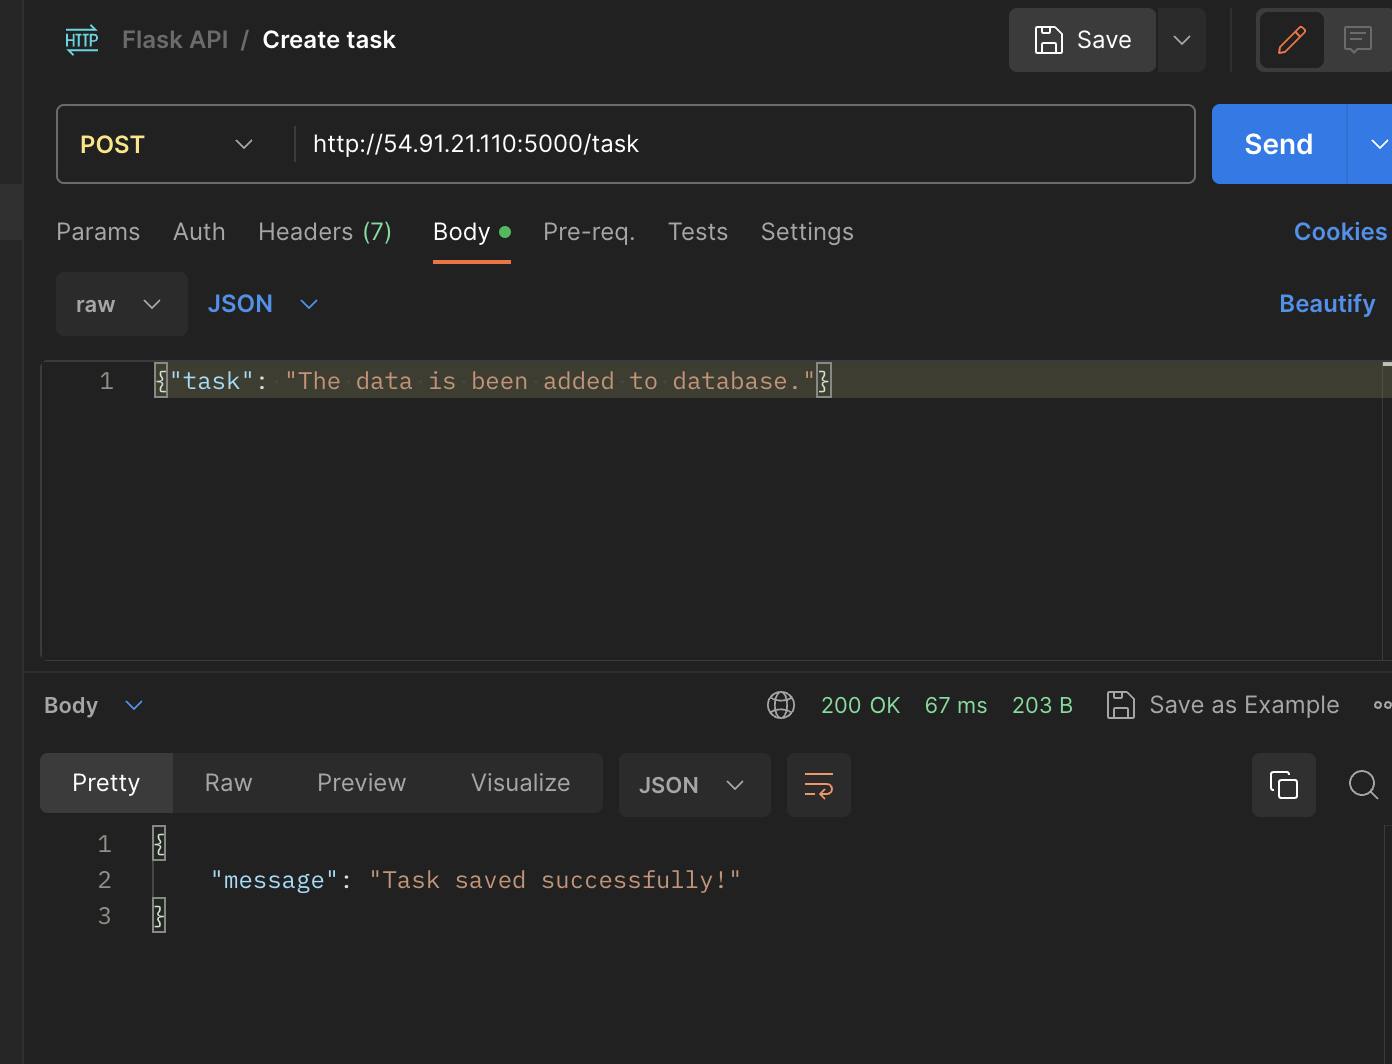
Creating an API
Creating a Task: Body > raw > JSON
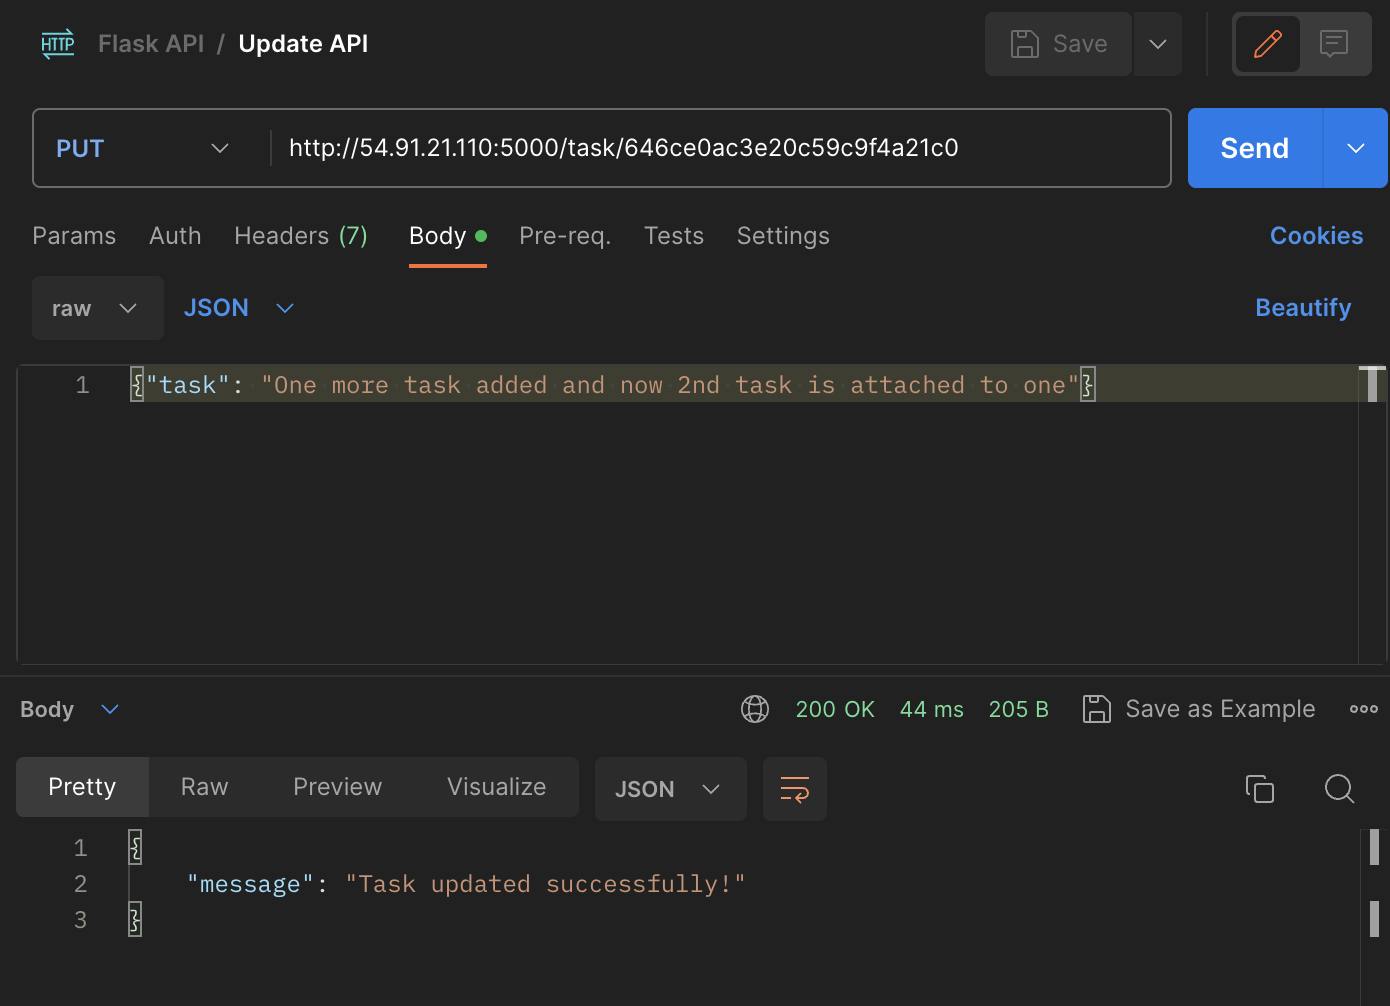
Update Task:
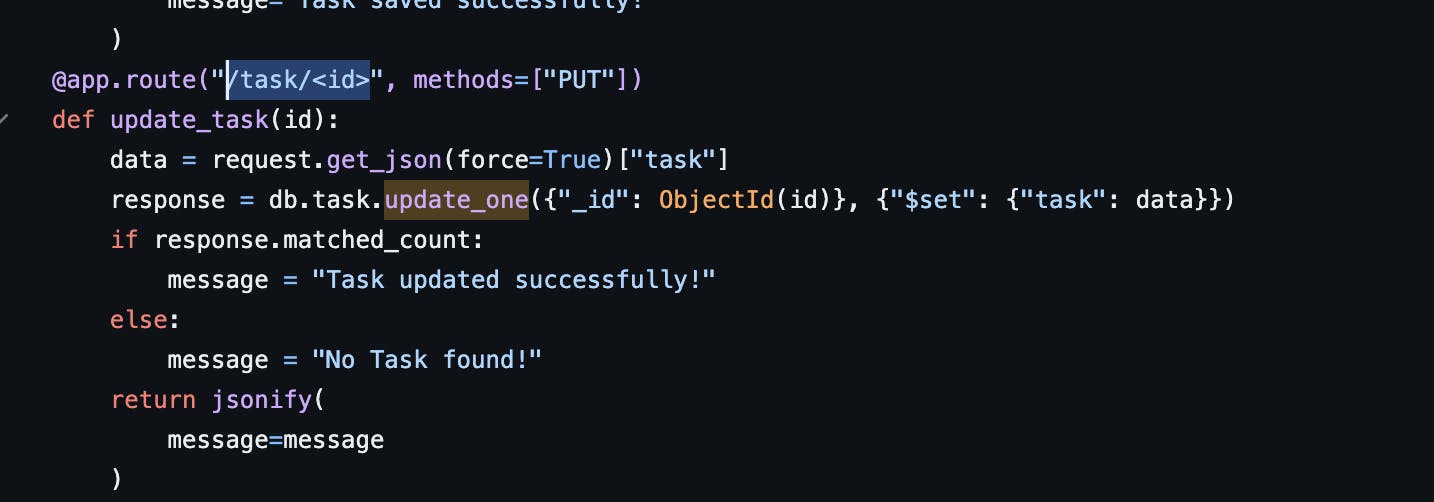
To update we use ' PUT ' :
Copy the task id after the URL:
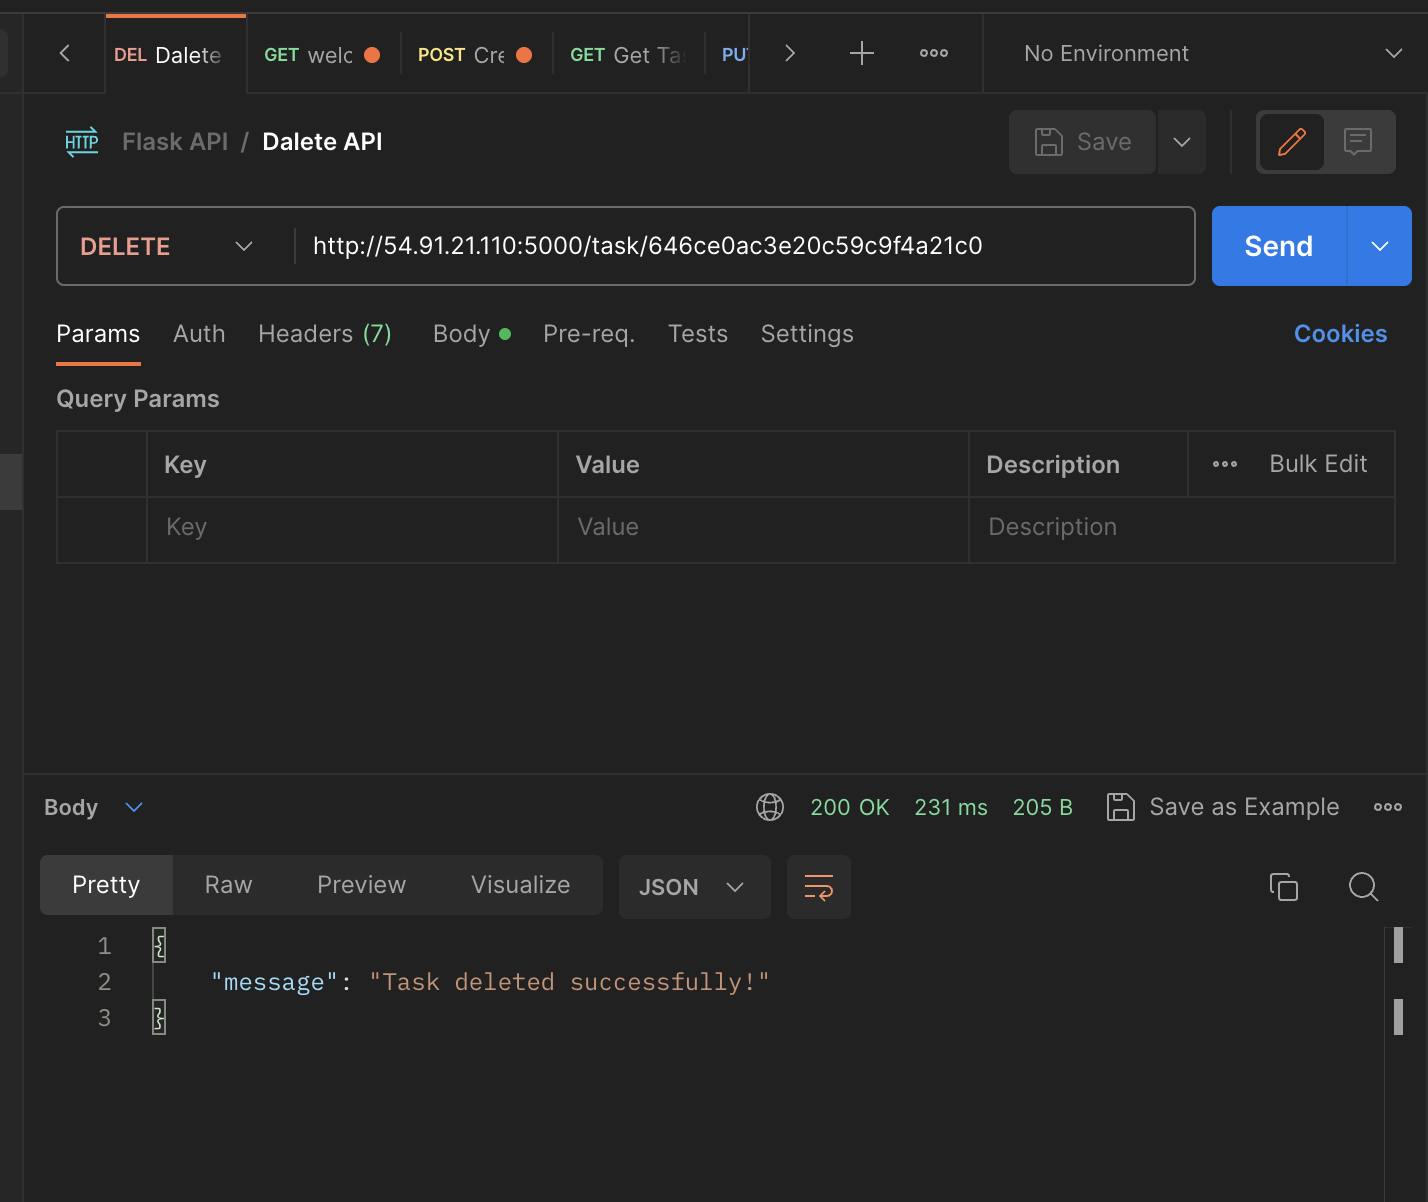
To delete the task we will create a new request using ' DELETE '